The past month was a bit of a squeeze with an overseas trip coming up as well as trying to finish the RTM Tempo’s rigging. “Frosting”, as Kaylee fondly calls it, has been in and out of my building’s parking lot over the last few weeks, and while I finally figured out most of what I wanted to do with it, there was still the two biggest headaches I had to deal with – installing a rudder and what to do with the tank well.
Installed a couple of rod holders in front to hold two trolling rods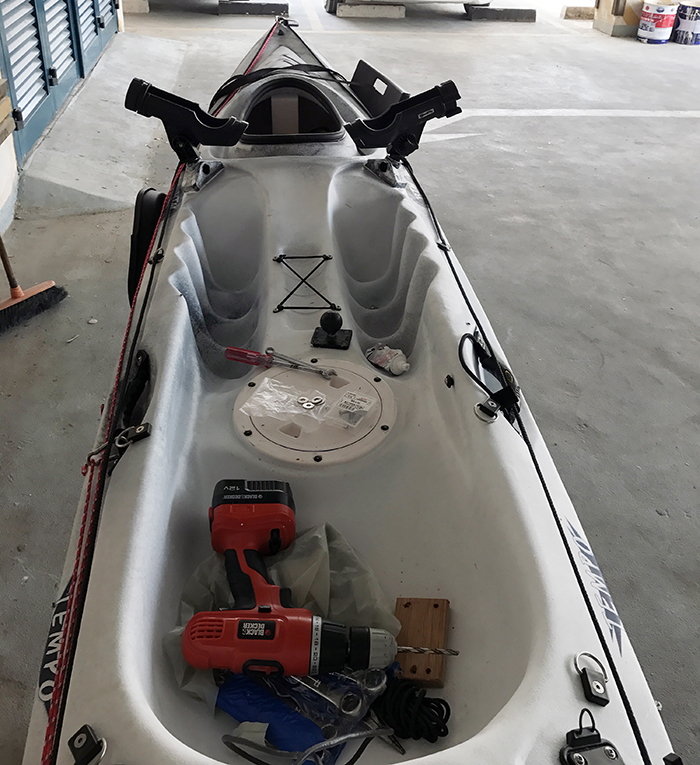
First, the tank well of the Tempo is not really crated friendly, so I had to find a way to put something that would function like a crate – even better if I can install rod holders, a big bonus would be if I am able to keep water splashing into it.
The rudder was another thing: this kayak is not designed to have a rudder – which means I’m going to have to do things the hard way and figure out how to put one on this.
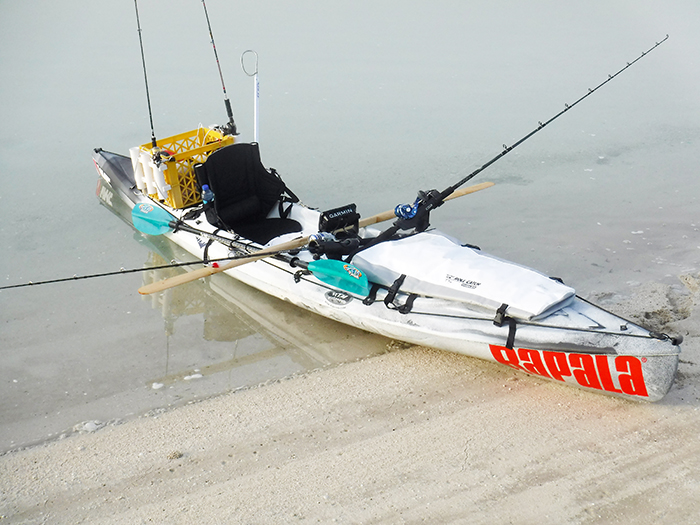 I am quite happy with how things turned out and can not wait to get out there again
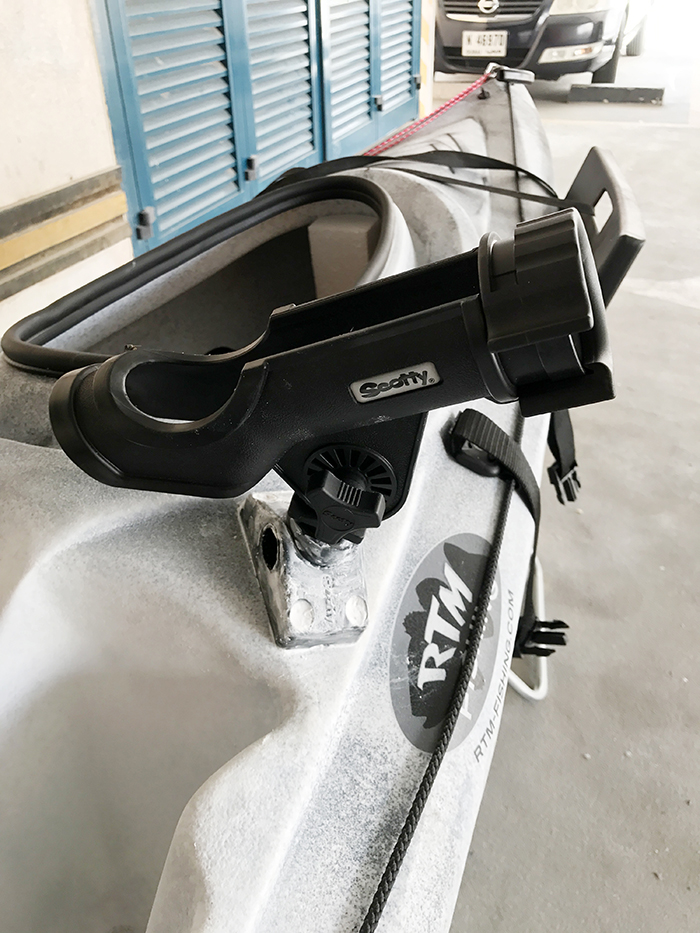
After all the stress and hoops I had to go through, I was able to finally install the rudder, I had to have a rudder bracket fabricated and the hardest part was to align everything so that the rudder would be an exactly dead center. The other problem with the rudder installation was the position of the rudder controls. The foot braces are molded in on the Tempo, which makes it impossible to install the adjustable rails that came with the foot brace/rudder control. After detaching the rudder controls from the rails, I was able to figure out the best position for it and bolted it into position, again, since this kayak is not rudder ready, the most challenging part of mounting the foot brace was aligning both of them. Once everything was in place, it was just a matter of drilling the holes and installing a length of gardening sprinkler tubes as cable runners (can buy them in ACE). For the rudder cables, I used coated wire, which I had to replace with assist hook cord, later on, to make them fully rust and salt proof.
Taking the foot pegs off the rails, I was able to install them in a good position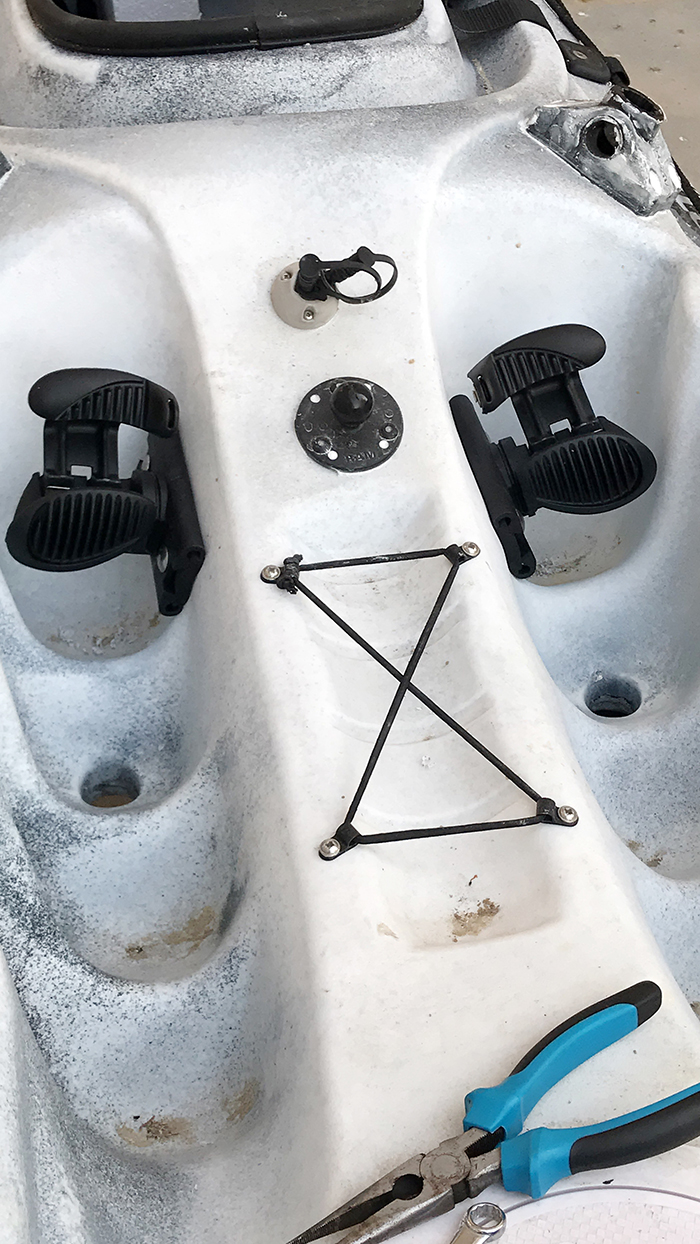
The footwells posed a big problem because I could not install the rails for the rudder control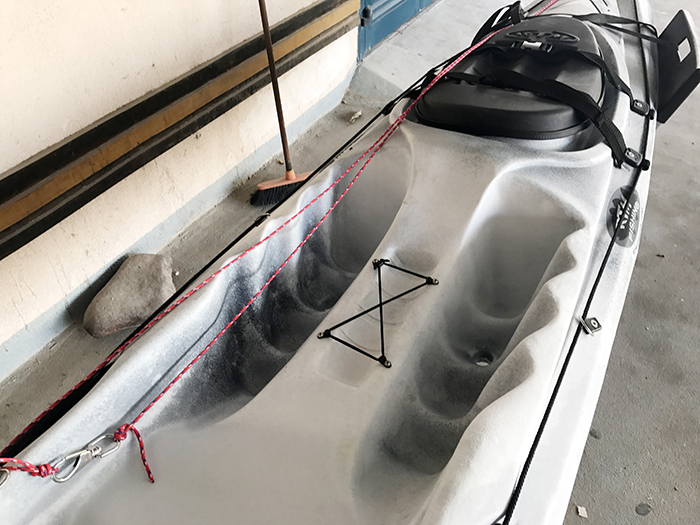
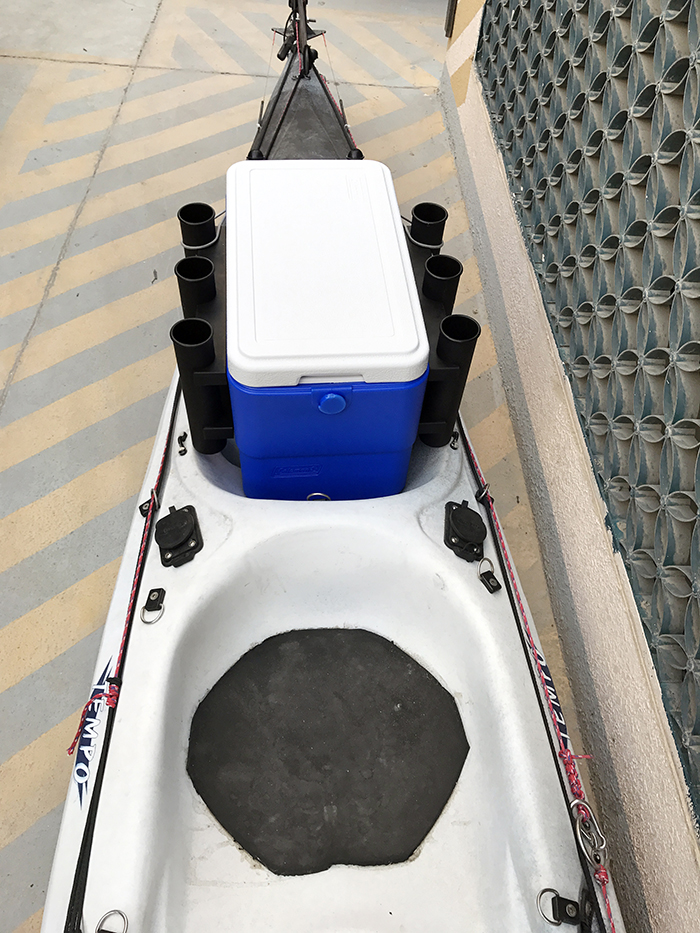
Once that was done, the next biggest issue was the tank well. The tank well of the Tempo is teardrop shaped with rounded sides and bottom. The shape makes it impossible to drop a standard milk crate in. I was able to figure out how to put a crate on there, but I wasn’t too happy with the placement since it was just too high up. After several tries, I finally managed to find a cooler box that fits, a few holes later, I was able to install two 3 rod capacity holders on the long sides of the cooler and it fits perfectly inside the tank well.


Because of the odd shape of the tankwell, it was impossible to drop a standard milkcrate inside
The only other problem, which was kind of minor for me since I mostly release my fish, was where to put the catch, which I managed to solve with an insulated fish bag that fits nicely on the bow of the kayak.
I also installed two rod holders in front, so I would be able to use long rods and keep them as far apart as possible and if I wanted to, I could troll up to four rods with this set up (not that I would, but if I need it, the option is there.)
Solved the issue with the crate and also installed some padding to keep me comfortable for long paddles
As a bonus, the icebox is waterproof, so I can keep all my things dry.
I have to say, now that everything is done, I am quite pleased with how things turned out for Frosting, and I am always very excited for the weekends (despite the heat) and I am looking forward to the next time I take her out.
I later changed these lockable rod holders to rocket launchers to give me more distance for my trolling spread

Installing the rudder was probably the most difficult part of the modification
The pictures attached are very self-explanatory, so I will keep the words down this time and let the pictures talk. ■
Till next tide change,
Kit Belen