Fishing is a very expensive sport. There is no denying that it is not something you pick up and commit to and save money on. There are a lot of people that stay within the budget range and catch big fish. However, the moment they hook something big and are not able to land it, it becomes a bit of a struggle to justify not spending for decent gear
Decent gear are investments that will last you a long time – this means that if you buy gear close to the top of the range, you wouldn’t need to change for a few years. This also puts you in the range of gear that are more than capable of catching some very serious fish – the main problem with this is that decent gear would more than likely set you back at least a couple of thousand dirhams. That is something you can’t change and is almost always beyond your control.
The second most pocket damaging category on the list are lures – these should be considered consumables because lures get damaged and it is almost impossible to get them back to their pristine condition when you get a hit, bang it on the rocks while casting or retrieving, or stop the rust from creeping up after usage. However, there are ways to make them last longer or even better, to make it a bit cheaper for yourself.
I have been making my own lures with dad’s miter saw for years and for people that have fished with me know, most of the time I go fishing, its mostly mucking around with something new I’ve tied on the vise, or something I made from a mould, carved with a knife or turned from a lathe.
For me, it’s mostly part of the process, after a day’s work, I get to do something fishing related and it clears my mind; as a bonus, it keeps me getting excited to try them out in the coming weekend – most of them are failures at first, but once you figure out a few things, they start to work and the whole process becomes addictive.
I first got into lure fishing because I realized that the biggest expenditure I would have would be on lures – after spending for a rod and reel, it became apparent to me that my meagre allowance was not enough to buy me all the lures I wanted, this was back in high school. The Philippines’ only tackle shop was in Manila and even if you made it there, the place was not well stocked. So we had to wait for months for the bulk order our fishing group made to companies in the United States and that wasn’t really a guarantee that we would get the ones we wanted because there was no way for us to know if the items we want were always on stock when our orders were placed.

Needless to say, lures are an angler’s version of a gold-digger’s jewellery. We can’t have just one and you can’t have just one colour – if it’s really effective, you have to have at least two backups. As for me, growing up around woodworking tools like a portable table saw, it was a no-brainer – lures can be made using materials we already had in our backyard – the machines were there and the woodworking knowledge I needed was a question away, either from one of our workers, or if I wanted an explanation that was more in depth, a quick run to my old man filled the gaps.
My first creations didn’t really go as planned, in fact, I don’t think I was able to fish it. I was so concerned of the durability of the lure that I used a wood that was too hard, it was supposed to be a to water lure, but because I used the wrong wood, it sank like it was made of lead. This is when I realized that there was more to it than just making it “look” right.
The Simple Stuff
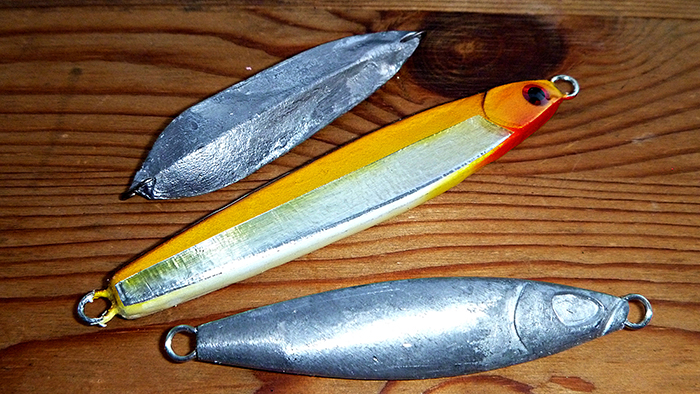
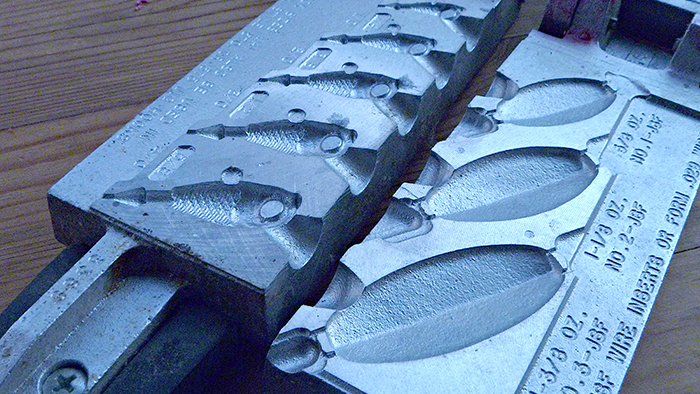
The easiest lures to make are the ones made of lead – you just need three materials: a jig hook, a mould and lead – the method is also very straightforward: you melt the lead and heat the mould, put the hook in its slot and pour the lead into the mould. Wait a few seconds, then take the finished jig off the mould. You need to take the sprues off the jigs and clean the flashings if you have some and that’s that! If you want it to look more sophisticated, then you can paint them, but quite honestly, I have caught a lot on unpainted jig heads enough to not make me worry about painting them – they look nice painted though, so if that’s your thing then go ahead.
Casting jigs or vertical jigs are a different story though – they don’t have dressings and although I believe their own action would be able to attract fish and get them to bite, a painted lure, especially one with shiny foiling will give a lot more flash and adds a visual appeal to fish and anglers alike. The most important aspect of a coloured lure however is the fact that anglers have favourite colours and this is the colour that he will end up casting more.
The main drawback is of course the limitations of the mould – you can’t easily deviate from it, and if you find yourself with a very effective lure you want to copy, you are out of luck.
There are predominantly two mould companies and I have used moulds from both of them, however, I almost always buy moulds made by the Do It Mould Company.
Wood
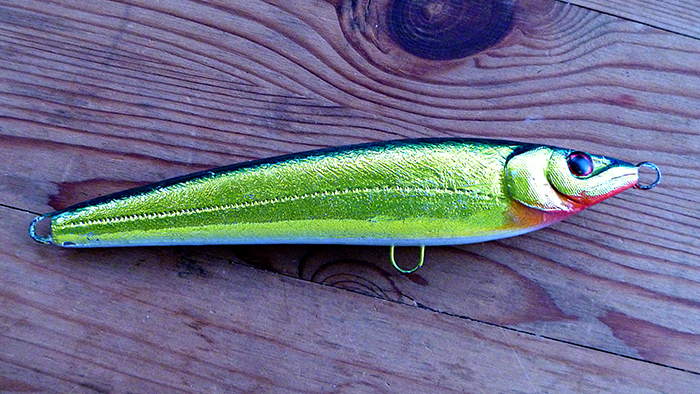
Wood is a bit challenging to work with but with a little bit of patience, you can either turn or carve out some decent lures.
The first rule of woodworking is always work with tools that are razor sharp, the duller the tools you use, the more dangerous it will be for you. I started using box cutters and cut myself so deep and found out the hard way why the tools need to be very sharp. These days, I use Japanese carving blades called Kiridashi and I have found that since you push them to shave the wood to be very safe
(Instead of drawing them towards you as you would with a western carving knife).
Balsa and Basswood are available in the UAE, albeit a bit expensive when first starting out because you waste a lot, you will soon be able to carve lures out easily. Balsa is the easier of the two to work with since it is softer. However, basswood makes lures that will take a bit more abuse.
When making carved wooden lures, you should consider where you place your weight as this is probably the most challenging part of the whole thing and also, it dictates the action and castability of the lure. There are a lot of resources available online and a lot of videos about lure making on Youtube.
Painting Lures
I come from a family of artists, yet of the three that our folks have brought to this world, I am the least skilled in the arts. So painting the lures to make them look pretty was something that eluded me for a while. I might not have the talent to carve and paint lures that would make them look good enough to sell, but I can make them at least decent enough for my friends and I to use. So I took the plunge and bought a small compressor and a few airbrush guns and started to practice. Within a few weeks, I was able to make them decent enough to tie on my line.
I mainly use acrylics, which I buy, from craft shops; I got my compressor and airbrush in Dragon Mart and the rest of the tools you can buy from ACE.
Parting Cast
As with fly tying, making lures is all about creativity and although I may not be the most creative person, I am one of the resourceful. Lure making is more of a skill rather than something that you need talent for, there are several videos on Youtube that show different methods of creating them and there are even step by step guides. It can get frustrating when you can’t get things to work.
You will need to seal your lures with epoxy to keep the paint from dissolving in the water – I have searched for the right epoxy for this, which I have found after some time. Go to a hardware store and look for the epoxy used for the protection of wooden floors.
Lure making isn’t for everyone — time constraints, space and dealing with all the tools and junk that comes with it makes it prohibitive to a lot of people – still some people just can’t be bothered and opt to buy a lure and be happy with it, while some people like me, really like doing things of this sort and enjoy each and every step of the process.
Good luck and email me some pictures of the stuff you made!
Till next tide change,
Kit
Words + Photos By: Kit Belen